There is a moment in every dad’s life where he must pass on the sacred knowledge: How to fold a proper paper airplane.
It is a rite of passage. It is one of the classic dad skills paper airplanes represent—a blend of art, science, and the ability to make a cool noise with your mouth when you throw it.
But today, we aren’t just folding paper. We are founding an aerospace company.
We are turning a simple rainy day paper craft into a full-blown STEM activity with paper. We are going to test, measure, and iterate. We are teaching engineering for preschoolers without them even realizing it.
Here is how to turn a stack of printer paper into a lesson on aerodynamics for kids.
Phase 1: The Design Studio (The Hangar)
You need standard 8.5x11 printer paper. Colored paper is a bonus (red flies faster, obviously), but white works just fine.
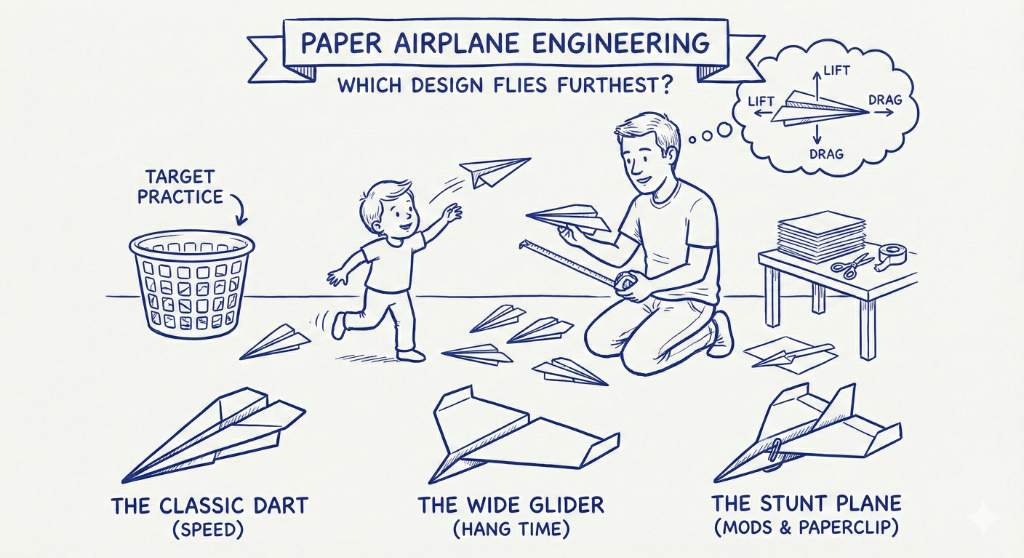
We are going to fold three specific paper airplane designs for kids to test different flight characteristics.
1. The Classic Dart (Speed & Distance)
- The Build: Fold in half lengthwise. Fold corners in. Fold corners in again. Fold in half. Fold wings down.
- The Hypothesis: This is the best paper plane for distance. It cuts through the air.
- The Physics: It has low drag but low lift. It needs a hard throw to work.
2. The Wide Glider (Hang Time)
- The Build: Fold the paper down about an inch at the top. Repeat 4-5 times to make a heavy nose. Fold the whole thing in a wide curve. Make the wings massive.
- The Hypothesis: This one won’t go fast, but it will float.
- The Physics: High lift. It catches the air like a parachute.
3. The Stunt Plane (Modifications)
- The Build: Take a Dart. Cut small slits in the back of the wings to create “elevators.” Add a paperclip to the nose for weight.
- The Hypothesis: This allows for customizing paper planes. We can make it do loops or turn left/right.
Phase 2: The Flight Test (The Competition)
Now, we head to the testing grounds (the hallway or the backyard for outdoor flying games). This is where testing paper planes becomes a competitive sport.
Event A: The Distance Derby
Stand at a starting line (mark it with tape). Throw each plane three times.
- The Measurement: Use a tape measure, or simply count “dad steps” to see where it landed. This is a great measuring distance activity.
- The Result: Which design won? Was it the Dart? Why?
Event B: Target Practice
Set up a laundry basket or tape a circle onto a doorway.
- The Goal: Paper plane target practice. Accuracy over power.
- The Lesson: Sometimes throwing harder makes the plane fly worse. You have to control your power.
Phase 3: The Engineering Debrief (Trial and Error)
This is the most important part. If a plane crashes immediately (and it will), do not crumple it up. Analyze it.
This is learning trial and error.
- Did it nose-dive? The nose might be too heavy, or you need to bend the back flaps (elevators) up to push the tail down.
- Did it stall and flip over? You threw it too hard, or the nose is too light. Add a paperclip.
- Did it curve left? Check the wings. Is one bent?
This conversation is the physics of flight for kids. You are discussing lift, drag, thrust, and gravity using a piece of paper.
Cleared for Landing
Paper airplane competitions are the ultimate cheap STEM project. They cost nothing but a few sheets of paper, yet they teach precision, patience, and the scientific method.
Plus, there is nothing quite as satisfying as watching a plane you folded glide perfectly across the entire living room.
Download FunDad on the App Store. Scan a piece of paper, and we’ll show you step-by-step folding instructions for different aircraft.